Pages

Tuesday, May 5, 2015

My Choice for Travel Landscape Photography - Sony A6000 with 10-18mm F4 OSS

It must be really a long time since my last update (actually, more than a year!). i’ve been very busy with work schedule so the site didn’t get very maintained with updates.

I didn’t have much time for photography, neither. So I was pretty much satisfied with Sony RX1’s performance for my daily use despite the temptation of the later generation of A7 series. However, I just got something new last weekend. As you can tell, instead of getting the trendy A7 mark II or A7S. I got myself a Sony A6000 body and an ultra wide angle lens, 10-18mm F4 OSS.

The reason that I need a new camera is simple - I am travelling! The destination this time is Turkey - a fantastic place combining west and east, european and asian. It’s famous for its cultural heritage and one of its most important highlights is the architecture. The churches and mosques are so grand and one of a kind. I certainly want to capture the best of them when I am there. An UWA lens will definitely help serve this purpose.

I am an advocate for travel light. Any extra weight to carry will kill the appetite of shooting pictures. So DSLR for sure, is out of my options. For smaller compact cameras, we’ve got recently launched Panasonic LX100, and Sony’s best-selling RX100 Mark III. They both received many positive responses and do have small bodies. However, both cameras have lens integrated and its widest is at 24mm (35mm equivalent). That is not wide enough for the landscape or buildings in Turkey, as I read through some travel blogs. Sony A7 Mark II and its latest 16-35mm FE mount look like the perfect fit. However, it costs a small fortune and out of my budget range (both camera and lens are SGD 2,000 plus each so it ends up being more than SGD 4,000 in total). That’s why I settled at my final choice - A6000 with lens 10-18mm F4 OSS.

I’ve reviewed the lens 10-18mm before. I was impressed with its performance even back then. And 10mm is probably the widest for APS-C cameras (9mm will be fish eyes) I have seen. A6000 receives quite good reviews from many users. No doubt, it was designed and built based on Sony's abundant experience and knowledge of its predecessors - NEX series. This camera was approaching the end of product cycle so I managed to get some good bargain as well.

Here are some usual unboxing photos..


DSC03032

As always, the orange colour for Sony alpha series.

DSC03033

Sony A6000 body, kind of a shame not having the hot shoe cover.. How much does that cost?

DSC03037

The rear side. I like the built-in electronic viewfinder. It’s pretty bright and clear, and doesn’t have any lag issues.

 DSC03039

The dials are well made, which reminds of previous NEX-7. The second dial is also customisable. 

DSC03041

The screen can be tilted 90 degree upwards. Too bad it can’t flip 180 degrees for selfies. But you probably expected that since there is a viewfinder in the way.

DSC03043

And here is the 10-18mm F4 lens.. Relatively large size compared to its E-mount peers.

DSC03044

It has built-in OSS, somewhat compensating the lack of large aperture. 

DSC03045

The body and lens assembled. It’s not very compact, but likely the smallest I can get for such wide angle.

DSC03049

The top view, indeed the 10-18mm is a bulk head.

Unnamed


I haven’t really got much chance of taking pictures with the new gears yet. Below is just a picture to show how wide the lens is at 10mm.. (I took the photo right in front of the table). I shall give more hands-on experience when I’m on the road.

DSC00002 3

DSC00008


Sunday, March 16, 2014

Electronic View Finder FDAEV1MK - The Must-Have Accessory for Your Sony RX1/RX1R

I have owned my RX1 for more than a year and I have been enjoying its superb image quality and portable size. However, I still somewhat miss my old days of DSLR while I could the camera near my eye and frame the picture in the view finder. It is not just about the professional feeling (well, it certainly helps me feel better!), it also helps stablize the camera and view the framing in direct sunlight. 

Sony has provided RX1 two options for view finder, first is the Zeiss optical view finder and the other is its electronic view finder. Zeiss view finder is nothing but a piece of glass with no other information supplied, and it’s priced at such a high premium (SGD 800+!!!). People with some sanity would choose the latter one. The electronic view finder, called FDAEV1MK, is so much more powerful and cheaper as well.

Well, when I say cheaper, it is not that cheap if you look at the absolute value (that’s probably true to most of Sony accessories..). But let’s admit that’s the only option I have for RX1. In Singapore, it’s priced at SGD 629. You are able to get a good point-n-shoot camera with that much of money. So I ordered this overseas from Amazon Japan and got my friend to bring it back. Thanks to the weaker yen and Japanese domestic pricing, I only spent about 400 SGD on this view finder, which is indeed a good deal.

Ok, let’s first start with the usual unboxing..

  DSC00300

The package comes with the viewfinder itself, a smaller eyecup for change, a leather case and a piece of wiping cloth.

DSC00301

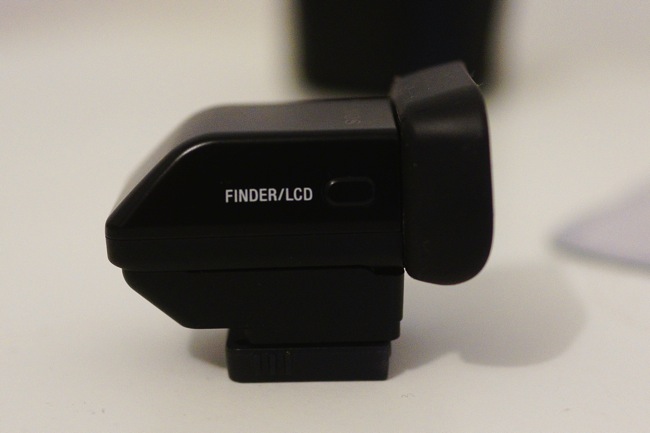
A close up of the view finder.

DSC00306

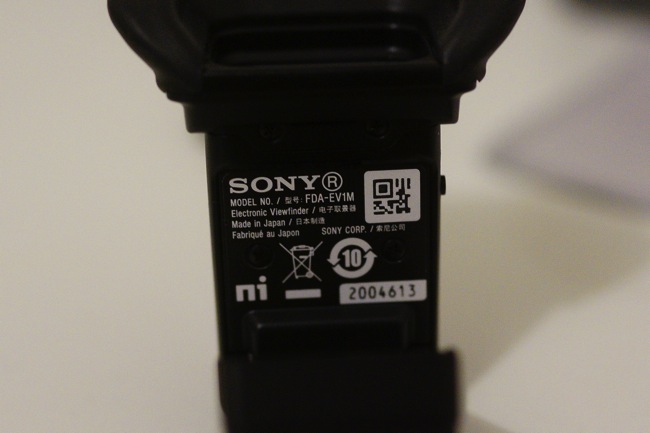
Made in Japan.

DSC00308

The viewfinder with the smaller eyecup on.

2014 02 26 22 26 55

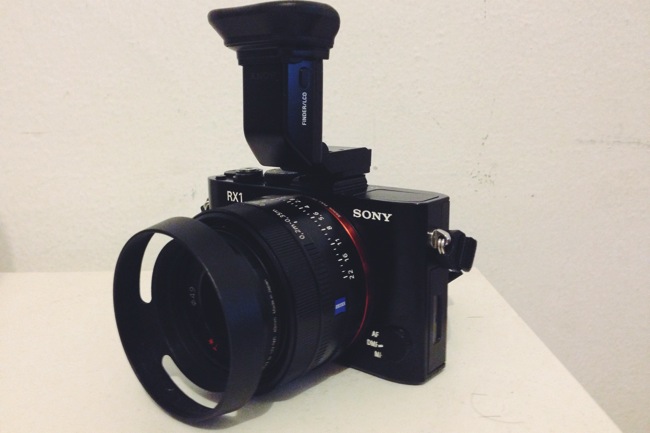
The view finder and RX1! Looks really cool.

2014 02 26 22 31 52 1

And of course it can be adjusted to different angles, up till 90 degrees, and suits different shooting situations.  

2014 02 26 22 32 46 1

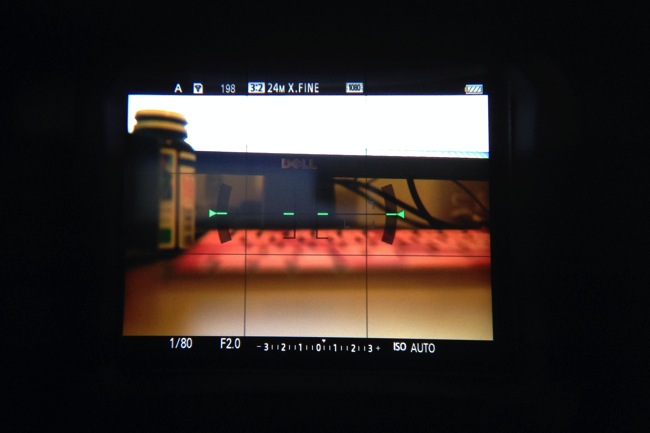
This is what you see through the viewfinder. It displays the same information you could see from the panel screen. You can even switch to settings, playback pictures, etc.

In the camera settings, you can set the viewfinder as auto on/off. So when your eyes are close enough, it automatically switches on the view finder and turns off when eyes are away. That’s very convenient for shooting and viewing. 

I’ve tried both eyecups and personally I feel the bigger eyecup suits me better. My nose touches the screen if I’m using the smaller eyecup which caused some discomfort. It’s probably better for people wearing glasses. 

So here is my conclusion of this electronic view finder:

1. It’s very well made and the image is bright, sharp and clear, the lag is very minimal.

2. It helps shooting and viewing under direct sunlight and it greatly reduces the shake when pressing the shutter.

3. The only drawback I found: there is no lock for the viewfinder. So I always have the worry that it will come off if I’m walking and it’s hanging around my body. But frankly speaking, the port is pretty tight and I don’t think it will come off that easily.

Thanks for the reading and enjoy your weekend!

Technorati Tags: , , ,

Monday, January 27, 2014

The Gear for the Gamer: Hands on with Steelseries Siberia Elite

When it comes to headset, the usual names coming up are Bose, Sennhesier, Beats, etc.. Although they all pursue better sound quality, the market segments they are tapping are slightly different. For example, Bose is thought as more business while Beats is more favoured by the younger generation. What I’m bringing today, is again something different from them, Steelseries’s latest headset, Siberia Elite. 

You may have not heard about Steelseries before if you are not a hardcore gamer. They manufacture all kinds of computer gaming related gears such as keyboard, mouse, mousepad and so on. Gamers want everything that makes their gaming experience better. Headset is definitely on the list of gears they will invest. A good headset puts games right into the scene and great sound quality is an essential part of the gaming experience. Clearly, Steelseries has something ready for them. 

To be frank, I am not a big fan of computer games, at least for the past 7, 8 years, so I don’t have much relevant experience I can speak about. This hands-on is more likely from a perspective of an outsider and if you are just looking for something that suits your need, you may find it useful. 

DSC00176

The package is of very good quality. 

DSC00179

Inside is the headset itself, it’s pure white which echoes its name Siberia. It has LED light on both ear cups, which will be shown later.

DSC00181

The headband part isn’t like most other headsets that are adjustable by pulling out extra part in the slot. It’s elastic so it will automatically adjust when you wear it. 

DSC00185

The microphone can be extended and position can be adjusted to make the sound reception better. 

DSC00180

The cable that attaches to the headphone is using a micro USB port, but don’t worry, it has provided adapters for 3.5mm jacket, and flight port. 

DSC00186

The USB sound card is the one which brings the best ability out of the headset. 

DSC00189

Here is size comparison with my Beats Solo HD. Beats Solo HD is about the normal size of a headphone. Clearly, Siberia Elite is much more bulky than Beats. That makes it less portable.   

When connecting the Siberia Elite to the computer via the sound card, you will be able to customise the headset. Before that, you need to download the software Steelseries Engine 3. That can be easily found from its official website. 

Screen Shot 2014 01 07 at 11 57 55 pm

In the interface, you can customise the sound quality as most of the audio software provides. What I want to mention here is also the ability to customise the illumination color of the LED lights. It can be set to certain color or shift between colors. That is pretty cool, although nothing much related to the sound quality.

Another thing is the Dolby headphone option. If you use a normal headphone before you would notice that the sound is very much constrained in the ear cups. In other words, you know that the sound is from the headphone. However, if you switch on the Dolby effect, it completely turns the sound into stereo. By saying stereo, I mean, you would have thought the sound is filled in your room, from your computer. That’s something I can only experience in cinema theatres, which is amazing.

In terms of sound quality, I can feel that the bass is pretty strong and the higher range isn’t too harsh. The sound resolution isn’t as high as other professional headphones but I think it’s good enough for gaming use. 

So here comes my verdict.

Good:

1. Very comfortable and great sound quality and highly customisable.

2. Really cool LED lights (well, this isn’t something you expect headset to have, but it is eye catching)

3. Convenient control over the ear cup.  

Bad:

1. The huge size makes it only suitable for desktop gaming, rather than day to day use.

2. The big cushions are comfortable but they keep the ears too warm if they are used for long time.

3. For the price tag, you may find other good alternatives. 

Well, I have to admit that I don’t have enough time with testing out this headphone so many of my impression could really be first impression. If one day I’m diving into the gaming world, I’ll definitely considering it as one of my gaming gears. Hope you find the review useful. Ciao!

Sunday, October 20, 2013

NEX-3N for Japan Trip: Hands-On and Thoughts

Hey sorry guys for the long overdue update! A heck lot of stuff are going on and I have been busy with sorting out them and again, sorry for writing this post so late!

As I mentioned in my previous post that I went on a trip to Japan. Japan is such a wonderful country to visit with very kind people, lots of tasty food and great sightseeing. It would have been better if its summer were less hotter (38 degrees when I was in Kyoto!).

2013 08 04 23 38 48

I brought all three Sony cameras on my trip, my own RX1 and NEX-5N, and the review unit of NEX-3N. Carrying 3 cameras seems overwhelming but thanks to their small sizes, I managed to put them into one bag without much effort. NEX-3N is still the smallest among all due to its smaller lens. Here are some pictures I took using NEX-3N when I was in Japan. All the pictures are taken using 20mm F2.8. 

DSC04251

ISO 2500, F5.6, 1/60s

Testing the self portrait shooting.. a bit blurry if it's zoomed in. But I guess it's good enough for Internet use.

DSC04253

ISO 1250, F5.6, 1/60s

Waiting for Airport limousine (OK, don't get misled by the name, it's just shuttle bus).

DSC04257

ISO 200, F3.2, 1/500s

The city view of Tokyo from Bunkyo Civic Centre. The huge tower in distance is the Sky Tree.

DSC04266

ISO 200, F2.8, 1/200s

A close-up shot of a tea bottle bought from vending machine. I just wanted to try out the bokeh of the lens at F2.8. It seems not bad, just a bit vignette effect at the corners.

DSC04272

ISO 1250, F2.8, 1/60s

Shibuya Station.

DSC04276

ISO 800, F2.8, 1/60s

The grand cross at Shibuya. I set ISO as Auto so that it keeps a minimum of shutter speed at 1/60s, but it is not fast enough to capture the moving people. So ISO should have been higher for this picture.

DSC04280

ISO 200, F4.0, 1/1250s

Muji Shrine. Although NEX-3N has in-camera distortion correction, the lens distortion is still visible.

DSC04359

ISO 200, F8.0, 1/100s

Kofuku-ji in Nara.

DSC04409

ISO 200, F4.5, 1/160s

A portrait shot.. The highlight is a bit overdone but I guess this is kind of Japanese style.

DSC04456

ISO 200, F2.8, 1/160s

There are so many deer in Nara! This is a very little gentle deer (before it saw the food in my palm). 

DSC04477

ISO 320, F5.6, 1/60s

Fushimi Inari Shrine in Kyoto, The Senbon Torii is a MUST-SEE! The red wood gate is called Torii in Japnese, and senbon means a thousand. But there are definitely more than a thousand torii like these there!

DSC04481

ISO 1250, F5.6, 1/60s

Handkerchieves in Kyoto. There are many Japanese traditional patterns and prints.

DSC04483

ISO 200, F5.6, 1/640s

Kiyomizu-dera in Kyoto.

DSC04485

ISO 800, F5.0, 1/60s

The Ramen in Japan is unbeatable! This one is from Santouka Ramen. I've also tried Ippudo. They are so much cheaper than the same in Singapore!

Here are some of my thoughts after using the camera on the trip:

1. The NEX-3N is positioned to strike a balance between portability and image quality. To be honest, many of the times I still used my own RX1 and NEX-5N on the trip for better image quality. But I guess for many consumers who are less demanding in image quality, NEX-3N is good enough as well. It's MUCH better than normal point-and-shoot cameras and just takes a little extra space in your bag

2. Image quality wise, the color seems less saturated compared to NEX-5N. That could be due to slightly different settings and lenses.

3. The camera's main body is made of plastic, although it feels less solid than a metalic body, it's less of weight and easy to slot in a small bag (most pockets are still too small for it though).

4. E-mount 20mm F2.8 is good for daily use. It's 30mm in 35mm equivalent, slightly wider than 35mm which makes it great for portraits with some background included. The lens itself is very thin and doesn't take up much space. However, the image distortion is quite obvious even after the in-camera correction. The pictures taken are somewhat soft (probably I am now too spoiled by my RX1!) and F2.8 is just not 'super fast'.

5. The interface is largely similar to other NEX models. Compared to NEX-5N, it offers electronic zoom joystick to conveniently zoom in and out using 'clear zoom'.

6. The flip screen helps in taking self portraits and the soft face touch makes the picture look greater! (Very important for girls :p)

7. The lack in wifi connectivity is kind of disappointing. Though it supports the Eye-Fi card, it would be good to have some basic wireless transferring feature in the machine itself, which makes instant sharing easier.

I could have taken more pictures using NEX-3N, but I think in the end bringing 3 cameras together is still way too much. Two cameras are good enough to complement each other on the trip. So I would suggest photographers to do that as well. 

In a nutshell, You should consider NEX-3N if you fall under one of the situations below.
1. upgrading from your point-and-shoot camera.

2. desiring better image quality with tight budget.

3. Getting a second NEX camera body to avoid hassle of changing lens.

4. wanting a camera to take good self-portraits (most likely for ladies).

Hope you have enjoyed this post and feel free to ask me any questions! Happy Friday!

Technorati Tags: , , ,

Saturday, August 3, 2013

NEX-3N First Impression

While I am still waiting to have a more in-depth review on Sony's latest camera, RX100II, I can't just let my vacation pass without something new! So I got this new member from Sony's NEX family, NEX-3N!

I've got many friends asking me before, "How do you think about the NEX-3N?" My answer is always neutral: only get it if you need it. To be honest, I wasn't particularly excited about this camera. As compared to my NEX-5N, which is an older model in the NEX 5 series, it has less control, not better image quality (although it is still far better than most point-and-shoot cameras). The advantage of NEX-3N is that it has a flip screen, that makes self-portrait much easier. Apparently, the target market is young ladies with passion about taking self-portraits and also want superior image quality. It is also smaller in size that makes this camera suitable for daily uses.

Below are some unboxing photos of NEX-3N. I am bringing it to Japan for vacation and more photos will be uploaded soon!

  DSC07928

The front view. My unit is a white body made of plastic. The camera comes with lens 20mm F2.8 pancake lens. It suits NEX-3N great in terms of portability.

DSC07929

Top view. The playback button now is place at the top panel, which takes me a little while to adjust to that. The shutter, zoom and power button are integrated together.

DSC07930

The control wheel is similar to those on other NEX bodies.

DSC07931

The built-in flash light that NEX-5N doesn't have! The trade off is that NEX-3N doesn't have hot shoe.. But I believe most NEX-3N users won't need that anyway.

DSC07932

Flipped screen makes self-portraiting fairly easy. However, that's the only way you can flip the screen. It can be flipped in the other direction.

DSC07933

The 20mm F2.8 pancake lens is somewhat similar to the previous 16mm F2.8, a fast and wide prime lens. The 16mm F2.8 has been criticised on its image quality. Let's see how the new 20mm F2.8 performs!

DSC07938

The lens also comes with a lens cap/hood that is used on E30mm 3.5.

DSC07935

The SD card slot is now put together with other output port, different from NEX-5N where battery and card slot are placed next to each other.

DSC07939

A side-by-side comparison with my Sony NEX-5N. NEX-3N is slightly taller but narrower. The most noticeable difference is the size of the grip. Clearly, NEX-3N's grip is much smaller. I guess that's also because the target group is young ladies?

DSC07940

From the top, the NEX-3N body is thicker than 5N, which offsets the slimmer E20 2.8 lens and makes two cameras almost identical in thickness.

I just landed Tokyo a while ago. Please check the blog regularly for more photos taken by NEX-3N!