Pages

Showing posts with label Lightroom Tutorial. Show all posts

Sunday, March 10, 2013

Lightroom Tutorial: Create Your Japanese-Style Photos

It has been long since I last posted a Lightroom tutorial on how to retouch skin using Lightroom. I must say that I am no way near a pro-photographer, or advanced user in post processing. I only use a few basic techniques to fine tune my photos. And today I am sharing one of my very often used techniques: how to create Japanese-style photos.

What's Japanese-style photo? It is not something clearly defined. This photography style originated from Japan and is most popular in Asian area. In general, the photo colours are light and undersaturated. The picture is somewhat over-exposed and slightly out of focus. Compared to normal photography, it demands fewer rules and techniques. The photos create a soft and light-hearted feeling. Some good examples can be seen below.

 Screen Shot 2013 03 10 at 9 15 12 AM

So next, how can we render and produce pictures like this? It may require both pre-processing and post processing work. 

Friday, April 20, 2012

Get Your Fair Skin Using Lightroom

It has been quite a while since I posted my last blog. I have been busy with school projects and presentations. Finally I got some time to write this new blog. Anyway, today I am writing on how I usually retouch skin in the post process. It might not be the best technique out there. But at least it does help to make you look better :)

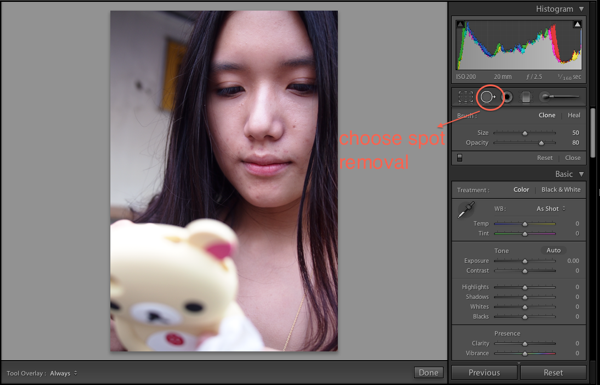
Here is an example how to do this. My friend is very kind to let me put her picture here as an example. Thanks very much! (For sure nobody wants to see my face here :p)

Screen Shot 2012 04 20 at 9 06 30 PM

↑First step is to open your Lightroom and go to the picture you want to edit and click "Develop" to bring you to the interface. As you can see, there are a few skin imperfections and our goal is to try to minimize or remove those. So first click the spot removal tool. You could adjust the size of the tool and its opacity. It's very much like the clone tool in Photoshop, so do not use the tool of too big size as the outcome may not be very smooth.

Sunday, April 1, 2012

Make Your Photos Movie-like/Vintage! - Tutorial on Photo Post-processing

Many of my friends now own a DSLR or at least a point-and-shoot camera. However, they often are not very satisfied with the picture they took. They complained that the photo is too plain or the landscape is simply not good enough. Actually, with some simple tricks, they can make the photo much more vivid and stunning. Today I'll share with you guys one technique I found most useful when editing my photos, especially for landscape.

Screen Shot 2012 04 01 at 8 39 34 PM

↑Here is the before and after using the effect. This photo was taken in Xiamen, China when I visited the seaside at sunset. The photo looks not bad but is a bit too plain and dull. After applying the effect, the photo looks more outstanding with greater contrast, richer colors, and a more classic look, whether you like to call it movie-like or vintage.